

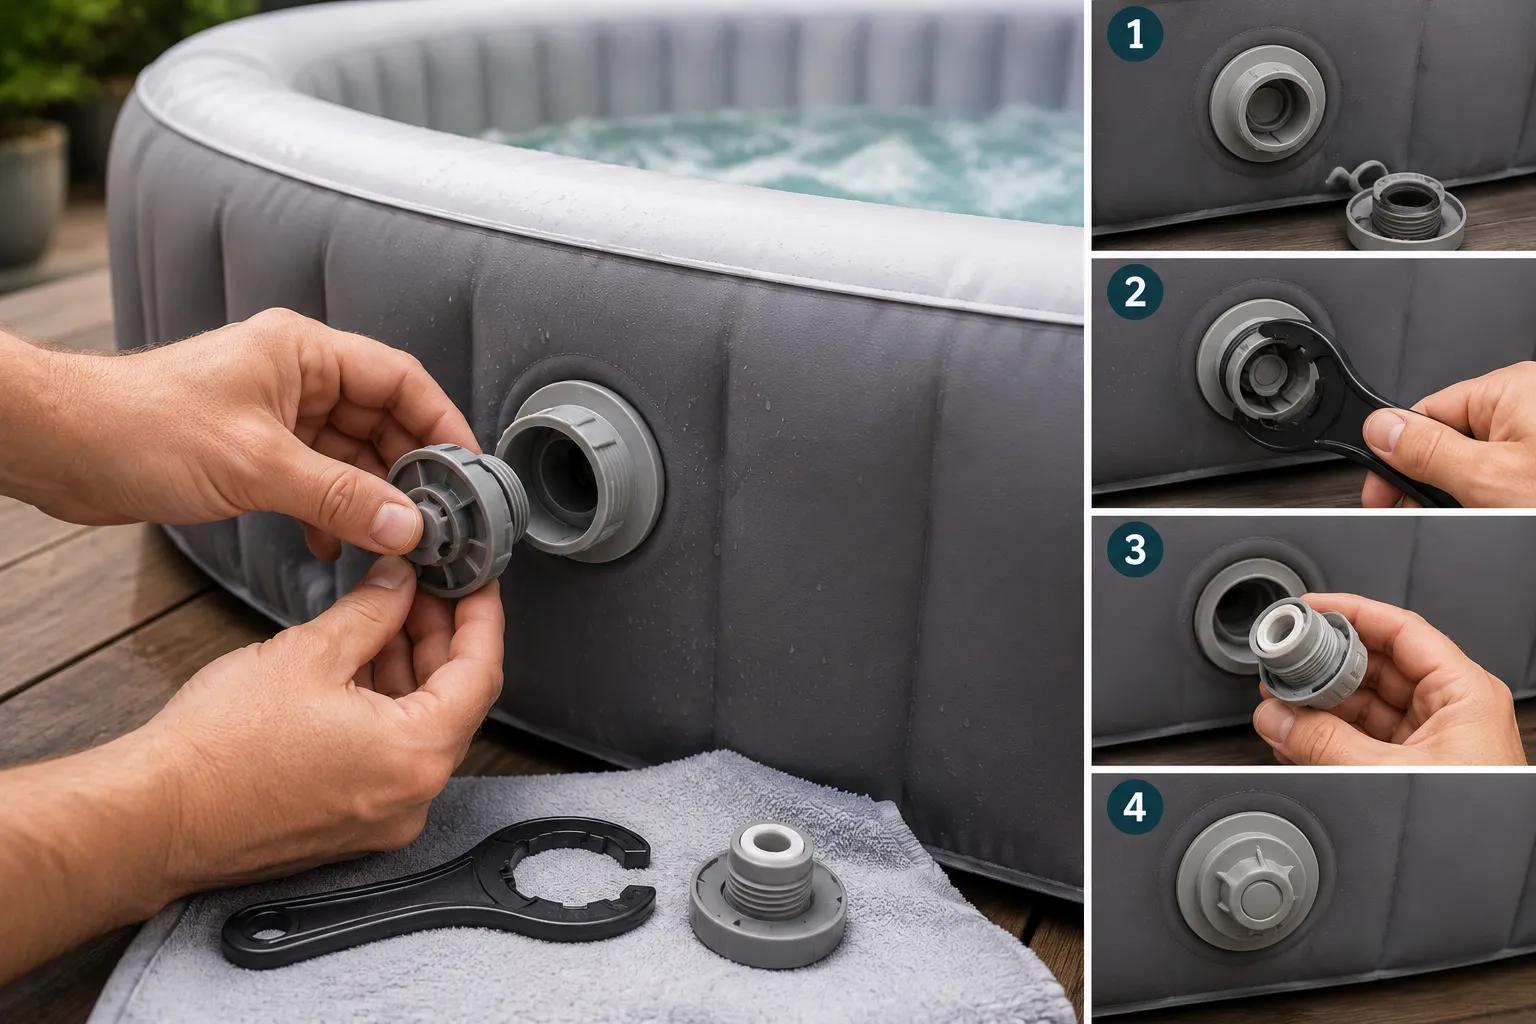
Inflatable hot tubs are designed for comfort, relaxation, and convenience, but over time certain components may wear out due to regular use. One of the most common issues owners face is a leaking or damaged air valve. Since the air valve helps maintain pressure inside the tub, even a small problem can cause slow deflation and reduce the overall performance of your spa. Fortunately, replacing an inflatable hot tub air valve is easier than many people think and can help extend the life of your hot tub.
Why Air Valves Need Replacement
Air valves are constantly exposed to pressure, moisture, temperature changes, and regular inflation cycles. After extended use, the valve may become loose, cracked, or worn out. In some cases, dirt and debris can also prevent the valve from sealing correctly, causing air leaks.
Signs that your air valve may need replacement include:
The hot tub loses air quickly
Hissing sounds near the valve area
Difficulty inflating the tub
Cracked or damaged valve parts
Water or air leaking around the seal
Replacing the faulty valve promptly prevents bigger issues and helps maintain the structure and comfort of your inflatable hot tub.
Gather the Necessary Tools
Before starting the replacement process, make sure you have the correct replacement valve designed for your inflatable hot tub model. Using the wrong size or type can lead to improper sealing.
You may also need:
A valve wrench or removal tool
Soft cloth or towel
Mild soap and water
Repair adhesive if recommended
Replacement gasket or seal
Having everything prepared beforehand makes the process quicker and smoother.
Step 1: Fully Deflate the Hot Tub
The first step is to completely deflate the hot tub. Working on an inflated tub can place pressure on the valve area and make removal difficult. Disconnect the power supply and allow all air to escape naturally.
Once deflated, dry the area around the valve thoroughly to avoid moisture entering the seal during replacement.
Step 2: Remove the Old Air Valve
Most inflatable hot tubs use threaded air valves that can be unscrewed using a valve tool or by hand. Carefully hold the inside backing piece if accessible while turning the outer valve counterclockwise.
Take your time during this step to avoid damaging the surrounding material. If the valve is stuck, gently loosen it instead of forcing it.
After removal, inspect the valve opening for dirt, cracks, or damage. Clean the area using mild soap and water, then dry it completely.
Step 3: Install the New Valve
Insert the new valve into the opening and align it properly with the inner seal or gasket. Tighten the valve securely but avoid over-tightening, as this could damage the inflatable material.
If the manufacturer recommends adhesive or sealant, apply a thin layer around the gasket for extra protection against leaks.
Make sure the valve cap closes tightly and sits evenly once installed.
Step 4: Inflate and Test for Leaks
After the new valve is installed, slowly inflate the hot tub and monitor the valve area closely. Listen for air leaks and check if the tub maintains pressure over time.
A simple way to test for leaks is by applying soapy water around the valve. If bubbles appear, the valve may need additional tightening or repositioning.
Final Thoughts
Replacing inflatable hot tub air valves is a simple maintenance task that can restore your spa’s performance and prevent unnecessary air loss. With the right replacement parts and careful installation, you can keep your inflatable hot tub comfortable, secure, and ready for relaxation. Regular inspections and timely repairs will also help extend the lifespan of your hot tub and save money on future replacements.